Thanks, Ken! and GREAT point! Primer is still a lot cheaper than basecoat/clear!Mentosman42 wrote:Looking good!
At the shop we use regular flat black spraypaint as guidecoat just as you did.
Its better to be sanding off primer than clear and basecoat ;P
Justin's '85 UrQ'd 4000 20vt Project - Tuning Help?
Re: Justin's '85 4000 20vt Project: Got sex'd by an UrQ?
Re: Justin's '85 4000 20vt Project: Got sex'd by an UrQ?
I'm not sure that's a title I am necessarily proud ofTwintowers wrote:I think you got me beat in the extended sanding department however... :-)
Re: Justin's '85 4000 20vt Project: Got sex'd by an UrQ?
Well, after about 3-4 more coats of primer and a crap ton of block sanding, I can finally say that the body is officially done!
I spent about a month sanding the car through various grits. Once I was happy with how smooth I managed to get the car w/ the 180grit sand paper, I went a little courser to the 220 grit. As I made the initial pass w/ the 220 grit paper a few more imperfections popped up in a few areas, so instead of continuing to cake on primer, I hit them w/ some evercoat filler (very light stuff!)
It was also now that I noticed that I didn’t have the face portion of my rocker panels as flat as I thought they were – again, primer shows ALL your sins! During the bending process, there were some dimples that formed as I manipulated the metal, so it caused a few dips to form. They weren’t too bad, so added some more light filler, sand, fill, sand –
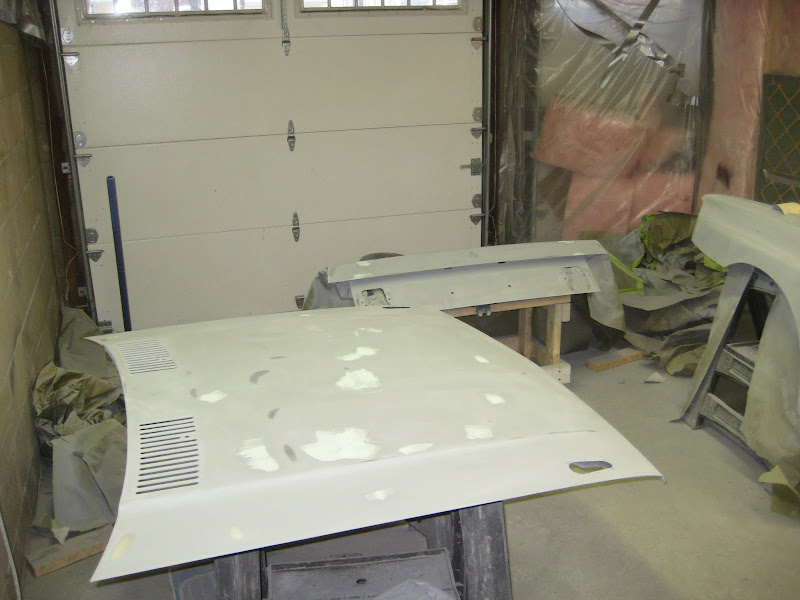
And a few tiny spots on the roof as well:
And everything cleaned up (I was a little over-generous w/ the filler, so I ended up sanding a ton off… still learning the art of “conservation of materials” *sigh*)
At this point, I was able to lay down one last coat of primer and block sand at 320grit. To my delight, I nailed it! All panels looked awesome and I was very satisfied. I am sure there might be a few touch-ups by the pros when they lay down the sealer before color, but I’m confident I’m at the 99% mark for everything, and that’s a-ok in my book.
From this point it was time to address the rocker panels and wheel wells. Since I have everything torn down, I decided it was a good idea to redo the undercoating on those portions of the car. Also, I wanted to protect the rockers from stone chips, etc. With the front fenders widened, they stick out a fair bit further than what originally used to be there (even for an UrQ). I’ve seen this done on BMWs, Fords, etc, and essentially I used an undercoating that was paintable to cover these surfaces.
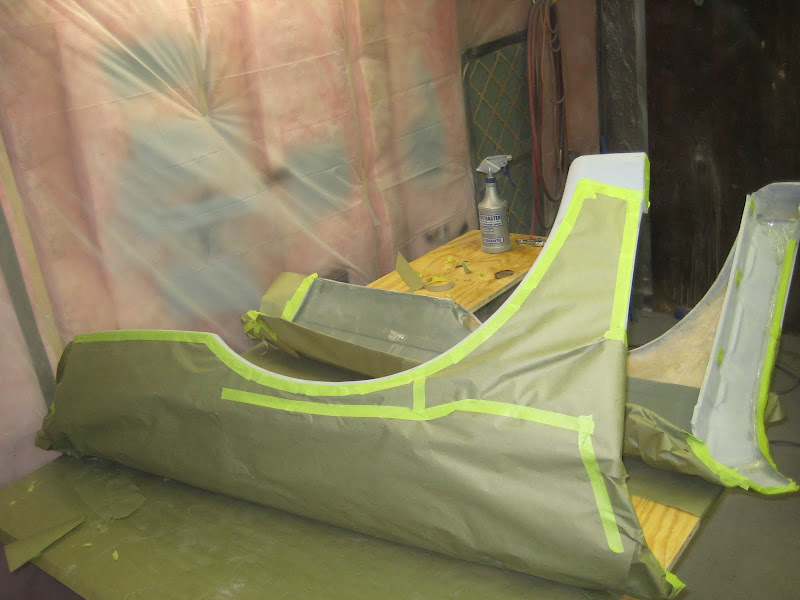
I started by taping off everywhere I didn’t want the coating to go. You will notice on the rear flares that I actually taped off enough so the lip also was undercoated. This is an effort to protect the fiberglass some. I’m not sure how successful I will be w/ this attempt, but it’s better than nothing at this point:
Once things were taped off, I then went at the car w/ seam sealer. I bought this stuff from the same guy I bought the bumper repair resins from. It seemed like a really good product, and was capable of bonding to both bare metal and painted surfaces:
Was a little bit messy to use (looked like I jacked off an elephant by the time I was done smearing it around), but it adhered nicely and left a good surface behind.
Then came the time to mummify the car before I started pressure washing! Of course, out came more plastic and tape:
And now time to have some fun! It was only 30 or so degrees outside, so what better time to pressure wash the car! I had presoaked the wheel wells with degreaser the day prior and let it really soak in. Then I went at each area and blasted off all the grime and grease that’s collected there for lord knows how many years. Def had a TON of crud come down. Needed to reapply and respray areas, and even get in there w/ a scraper to remove the nasty stuff. All said and done, it came out pretty nicely:
The aftermath was a little bit interesting issue, as there were no drains in the garage and it was around 30-40 degrees outside and I needed to attempt to dry out a garage and car that are both soaked. I fired up the heater Friday afternoon/evening and ran it straight through Saturday afternoon (powering off of 20lb propane tanks, so I needed a few spares to make sure I had enough to carry me through). By Saturday afternoon, with the help of a fan going non-stop as well, the bay was nice and dry as was the car:
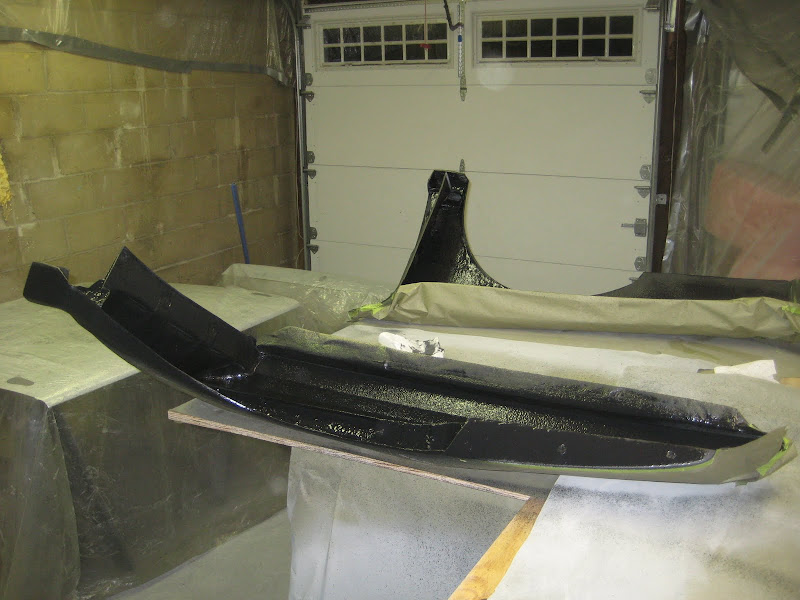
From this point, it was time to undercoat! This is the same stuff that Hadyn had used on his 4kq. It’s a really nice product.
It goes on easy, and is very easy to clean up once you’re done. You can adjust the finish depending on the pressure you’re running through the gun. Being that I wanted some of this to be a painted surface, I wanted the texture on the smoother side of things, so I ran it at a higher pressure. End product turned out really nice! I had to go back and touch up a few areas Saturday night, but overall, I’m stoked with the final outcome.
Here are some “after” pictures:
And the final look w/ all the plastic removed:
At this point, I can officially claim the unibody is complete. I have to sand a few seams to cut down the built up paint where the tape/paper met the body, otherwise once she’s a roller, it’s time for the remaining panels.
Right now the next task is rebuilding the suspension while it’s out of the car. What I had done to space out the rear hubs in order to make the 200 20v rear brakes work on the car just isn’t working. I don’t think the spacers can hold up to the torque applied by the axle nut, so when I take the car on track the stress compresses the spacers and ends up causing the axle nut to loosen. Happens w/ r-comp slicks or street tires. I’ve cooked 2 sets of bearings at this point, so it’s time to fix this once and for all. Going to need to do a little bit of re-engineering, but hopefully will get it figured out in short order. It will more than likely involve some machining of the rear caliper brackets to make up the 1/8” I’m going to need to pull the hub in to remove the spacer. Or I am going to need a better material on the spacer, but honestly I’d like to completely remove it at this point. Also, while the suspension is out, I’m going to rebuild all the axles, since they haven’t been touched in lord knows how long.
Also, my current headache is getting the car running again. I had upgraded to an 034 Ic ECU (from the Ib) so I had more control over the boost on the car and to shy away from the distributor as the main way for setting the timing. Right now it’s not quite firing, hopefully we’ll have it figured out soon, as I think it’s close. Need to tweak a few other things and hopefully it’ll be up and running again.
So, hopefully by the end of the month I can have the car rolling and out of the garage and get started on the rest of the panels. I’m hopeful to get this thing done and to the shop by mid/late Feb at this point. Life isn’t giving me enough time to get this done in the timeframe I want, but not much I can do about it at this point!
Anyway, hope you enjoyed the show! Until next time.
I spent about a month sanding the car through various grits. Once I was happy with how smooth I managed to get the car w/ the 180grit sand paper, I went a little courser to the 220 grit. As I made the initial pass w/ the 220 grit paper a few more imperfections popped up in a few areas, so instead of continuing to cake on primer, I hit them w/ some evercoat filler (very light stuff!)
It was also now that I noticed that I didn’t have the face portion of my rocker panels as flat as I thought they were – again, primer shows ALL your sins! During the bending process, there were some dimples that formed as I manipulated the metal, so it caused a few dips to form. They weren’t too bad, so added some more light filler, sand, fill, sand –
And a few tiny spots on the roof as well:
And everything cleaned up (I was a little over-generous w/ the filler, so I ended up sanding a ton off… still learning the art of “conservation of materials” *sigh*)
At this point, I was able to lay down one last coat of primer and block sand at 320grit. To my delight, I nailed it! All panels looked awesome and I was very satisfied. I am sure there might be a few touch-ups by the pros when they lay down the sealer before color, but I’m confident I’m at the 99% mark for everything, and that’s a-ok in my book.
From this point it was time to address the rocker panels and wheel wells. Since I have everything torn down, I decided it was a good idea to redo the undercoating on those portions of the car. Also, I wanted to protect the rockers from stone chips, etc. With the front fenders widened, they stick out a fair bit further than what originally used to be there (even for an UrQ). I’ve seen this done on BMWs, Fords, etc, and essentially I used an undercoating that was paintable to cover these surfaces.
I started by taping off everywhere I didn’t want the coating to go. You will notice on the rear flares that I actually taped off enough so the lip also was undercoated. This is an effort to protect the fiberglass some. I’m not sure how successful I will be w/ this attempt, but it’s better than nothing at this point:
Once things were taped off, I then went at the car w/ seam sealer. I bought this stuff from the same guy I bought the bumper repair resins from. It seemed like a really good product, and was capable of bonding to both bare metal and painted surfaces:
Was a little bit messy to use (looked like I jacked off an elephant by the time I was done smearing it around), but it adhered nicely and left a good surface behind.
Then came the time to mummify the car before I started pressure washing! Of course, out came more plastic and tape:
And now time to have some fun! It was only 30 or so degrees outside, so what better time to pressure wash the car! I had presoaked the wheel wells with degreaser the day prior and let it really soak in. Then I went at each area and blasted off all the grime and grease that’s collected there for lord knows how many years. Def had a TON of crud come down. Needed to reapply and respray areas, and even get in there w/ a scraper to remove the nasty stuff. All said and done, it came out pretty nicely:
The aftermath was a little bit interesting issue, as there were no drains in the garage and it was around 30-40 degrees outside and I needed to attempt to dry out a garage and car that are both soaked. I fired up the heater Friday afternoon/evening and ran it straight through Saturday afternoon (powering off of 20lb propane tanks, so I needed a few spares to make sure I had enough to carry me through). By Saturday afternoon, with the help of a fan going non-stop as well, the bay was nice and dry as was the car:
From this point, it was time to undercoat! This is the same stuff that Hadyn had used on his 4kq. It’s a really nice product.
It goes on easy, and is very easy to clean up once you’re done. You can adjust the finish depending on the pressure you’re running through the gun. Being that I wanted some of this to be a painted surface, I wanted the texture on the smoother side of things, so I ran it at a higher pressure. End product turned out really nice! I had to go back and touch up a few areas Saturday night, but overall, I’m stoked with the final outcome.
Here are some “after” pictures:
And the final look w/ all the plastic removed:
At this point, I can officially claim the unibody is complete. I have to sand a few seams to cut down the built up paint where the tape/paper met the body, otherwise once she’s a roller, it’s time for the remaining panels.
Right now the next task is rebuilding the suspension while it’s out of the car. What I had done to space out the rear hubs in order to make the 200 20v rear brakes work on the car just isn’t working. I don’t think the spacers can hold up to the torque applied by the axle nut, so when I take the car on track the stress compresses the spacers and ends up causing the axle nut to loosen. Happens w/ r-comp slicks or street tires. I’ve cooked 2 sets of bearings at this point, so it’s time to fix this once and for all. Going to need to do a little bit of re-engineering, but hopefully will get it figured out in short order. It will more than likely involve some machining of the rear caliper brackets to make up the 1/8” I’m going to need to pull the hub in to remove the spacer. Or I am going to need a better material on the spacer, but honestly I’d like to completely remove it at this point. Also, while the suspension is out, I’m going to rebuild all the axles, since they haven’t been touched in lord knows how long.
Also, my current headache is getting the car running again. I had upgraded to an 034 Ic ECU (from the Ib) so I had more control over the boost on the car and to shy away from the distributor as the main way for setting the timing. Right now it’s not quite firing, hopefully we’ll have it figured out soon, as I think it’s close. Need to tweak a few other things and hopefully it’ll be up and running again.
So, hopefully by the end of the month I can have the car rolling and out of the garage and get started on the rest of the panels. I’m hopeful to get this thing done and to the shop by mid/late Feb at this point. Life isn’t giving me enough time to get this done in the timeframe I want, but not much I can do about it at this point!
Anyway, hope you enjoyed the show! Until next time.
-
ralleyquattro

- Posts: 858
- Joined: Wed Feb 27, 2013 1:46 pm
Re: Justin's '85 4000 20vt Project: Got sex'd by an UrQ?
Wow! Nicely done!
I used a Hotsy (Hot water pressure washer) and could not believe how clean the underside came out.
HTH
I used a Hotsy (Hot water pressure washer) and could not believe how clean the underside came out.
HTH
Martin Pajak
http://www.quattro.ca
82 Audi Ur-q, SQ project
83 Audi 80 q, Euro 2-Door
85 Audi Ur-q, Euro mit 3B
91 Coupe Quattro
93 Audi 80 q Avant, 2.5 TDI with 6-speed
04 Audi A4 1.8Tq Avant USP 6-speed
04 Audi A4 3.0q Avant USP 6-speed
http://www.quattro.ca
82 Audi Ur-q, SQ project
83 Audi 80 q, Euro 2-Door
85 Audi Ur-q, Euro mit 3B
91 Coupe Quattro
93 Audi 80 q Avant, 2.5 TDI with 6-speed
04 Audi A4 1.8Tq Avant USP 6-speed
04 Audi A4 3.0q Avant USP 6-speed
-
ringbearer

- Posts: 1282
- Joined: Wed Feb 27, 2013 12:50 pm
- Location: Nor-Cal
Re: Justin's '85 4000 20vt Project: Got sex'd by an UrQ?
It really looks good! And LOL @ jacking off an elephant. I turn up my hot water heater and run hot water through my pressure washer, not a Hotsy but still helps cut grease.
Re: Justin's '85 4000 20vt Project: Got sex'd by an UrQ?
If I would have thought about it, I have a hot water in the basement I could have tapped into. Oh well, save that for next time. Either way, it did the trick as necessary.
-
Highlander
Re: Justin's '85 4000 20vt Project: Got sex'd by an UrQ?
Looking great!!
Really miss my 4000, and your is going to be amazing.
Great work.
Cheers.
Craig
Really miss my 4000, and your is going to be amazing.
Great work.
Cheers.
Craig
-
Twintowers
Re: Justin's '85 4000 20vt Project: Got sex'd by an UrQ?
Paint the dam thing already! 
Re: Justin's '85 4000 20vt Project: Got sex'd by an UrQ?
So it’s been a helluva last week or so, and to say that I’m both mentally and physically exhausted is probably making a vast understatement. But the good news is, the ‘ol bird is finally out of my hands and into the hands of the pros!
Over the past 2-3 weeks, I’ve been really pushing along trying to get the 4000 done and ready to go to the body shop by March 8th. This was a self-imposed deadline I made for myself in hopes of getting it painted and reassembled to make our PCC-ACNA event at VIR in April. I’m still unsure if I will actually be able to get the car together by then, but I will at least go down swinging if not fully successful.
So a few weeks ago, I finally was able to finish rebuilding the rear suspension and remove a few of the “weak links” that were causing me issues in the rear suspension with the axle nuts loosening on track and causing a very loose wheel when rounding the track (and even happened on the street too). Once I was able to get that complete, I went about attempting to get the car running on its new 034 Ic ECU. Unfortunately, after many attempts, many hours on the phone trouble shooting, and many hours tinkering w/ the ECU we were unable to get the car up and running… so unfortunately, the car is still running on foot power vs. real horse power, but not the end of the world.
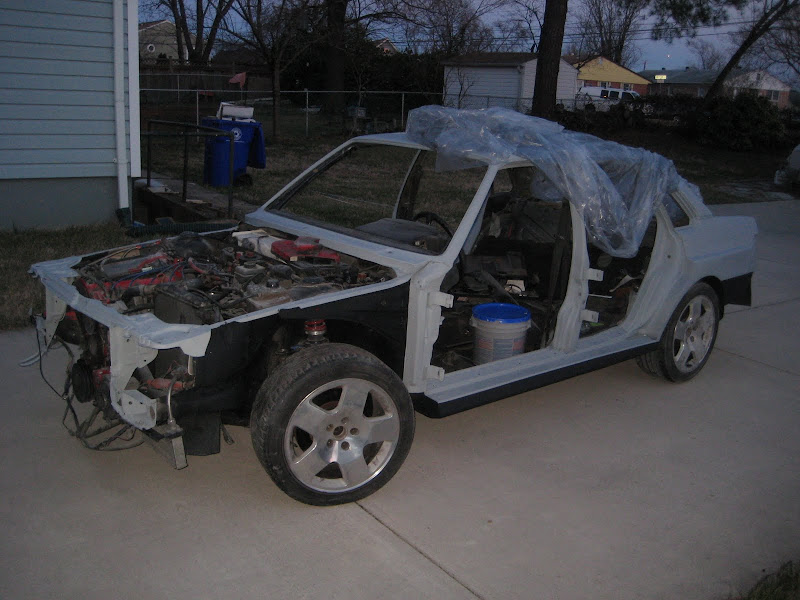
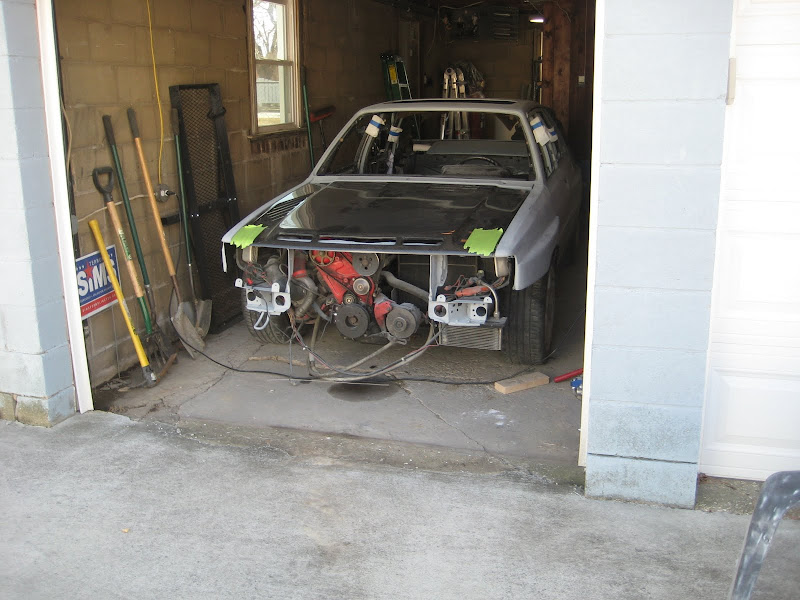
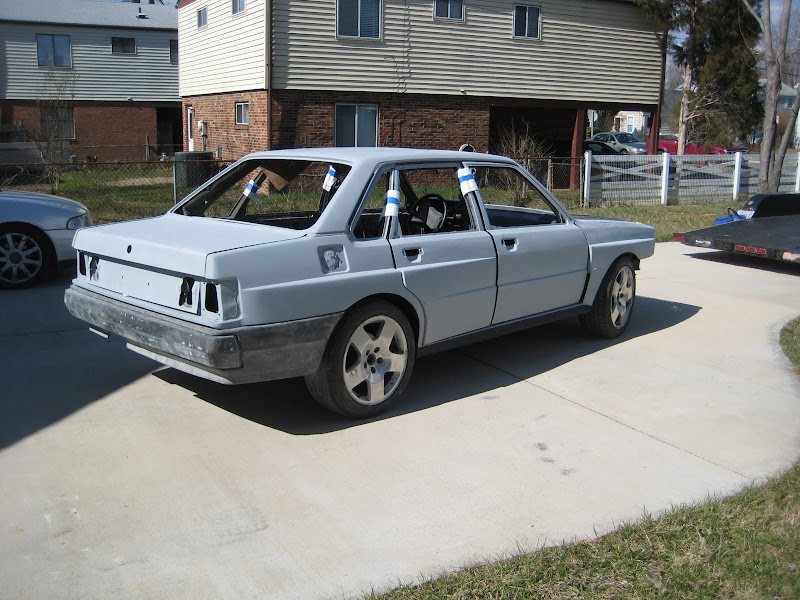
After I gave up trying to get it running the first time, my cousin and I pushed the car out of the garage so I could start prepping to paint the remainder of the removable parts. I will not lie, I was a little excited to see the car finally out of the garage and primered:

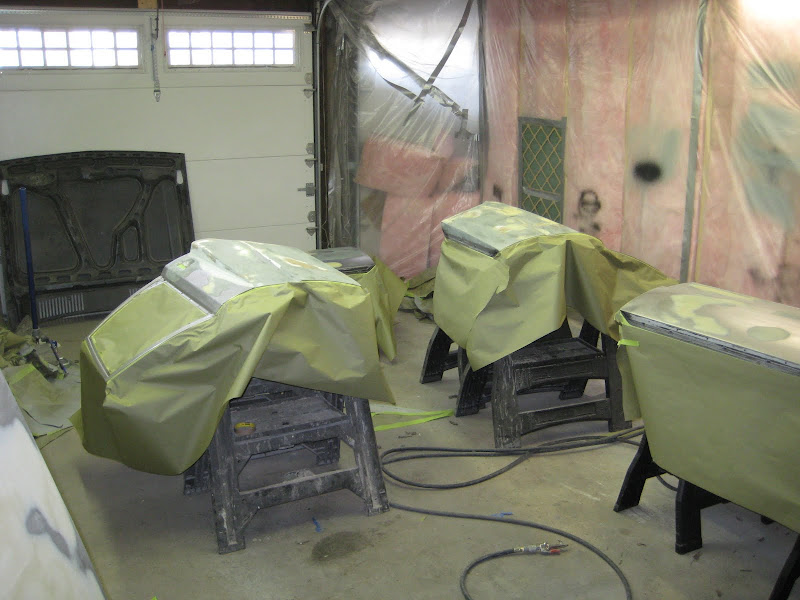
But once she was out of the “paint booth” and into the adjacent bay, it was game time. Since I didn’t have enough saw horses (not to mention space) to paint everything at once, I worked in two stages. First stage was to paint all the doors, as I knew these were going to require a *bit* more work than the other panels (or so I thought).
Started off with roughing everything up and cleaning the metal of any surface rust that has formed in the year plus they’ve been sitting as bare metal:

And then a masking I went so I didn’t get an immense amount of overspray on the non-bare metal areas. The backsides of the panels will be addressed by the body shop, but no sense making their job more difficult by covering everything w/ overspray!
First coat of paint went on nice and easy,

And then a blocking I went. Doors ended up taking 3 coats of primer. I actually got a LOT quicker than I was with the car body (practice makes perfect I guess), and was able to finish the doors off in about a weeks time, working 3-4 hours a night on most nights. There were a few high/low spots, but overall it really wasn’t terrible thankfully. The time I put into getting everything flat w/ the filler really paid off.
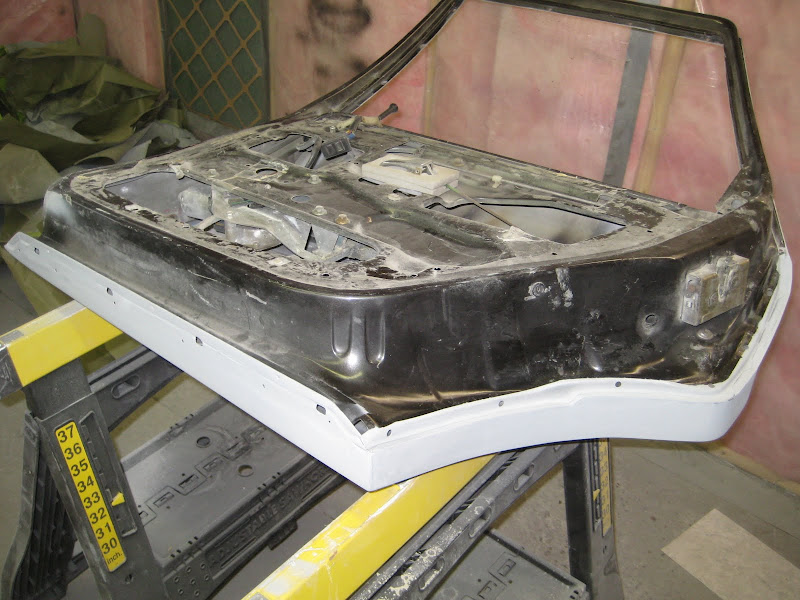
And the backsides of the rear doors where I blended the flares:

And the bottom (hard to tell it wasn’t there to begin with at this point!!)

And after the doors were done, I employed the wife to come out on a blistery Sunday afternoon at the beginning of last week and help me mount the doors (so they didn’t get knocked over and damaged after I spent so much effort on them):


She’s taking shape!!!
From this point, we come to the beginning of last week. This was a marathon crunch for me, spending between 6 and 10 hours a day sanding, painting, cleaning, filling, sanding, painting, cleaning, painting and sanding!!! I am grateful I have an EXTREMELY patient wife, as she basically didn’t see me last week so I could meet my March 8th deadline. While I was tired and ready for the car to be gone the week before, I was REALLY ready for it to be gone now… I was drained.
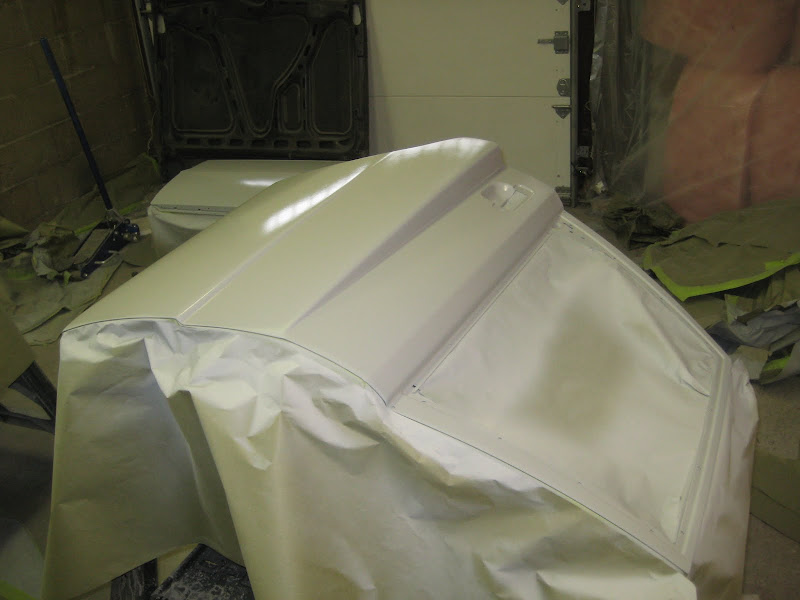
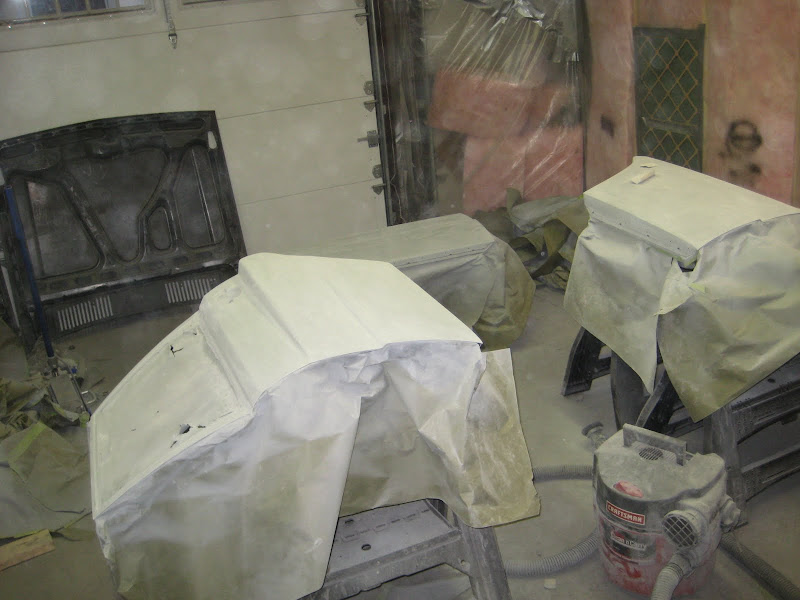
But I still had work to do, so in went the fenders, hood and trunk!

And after a bit of sanding and cleaning, on went the paint!
And then a blocking I went one more time:
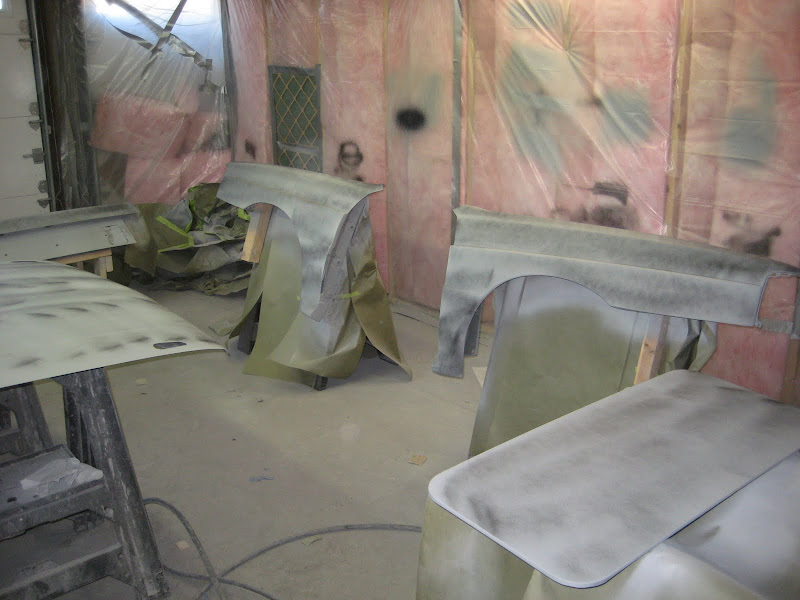
Unfortunately, a lot of the stamped metal (untouched by me) had a lot more dips than I had anticipated. The hood was a real PITA (as expected w/ large flat surfaces). Also, the tops of the fenders also had a fair bit of waving going on in it that wasn’t detectable by the eye, but you really felt it when running your hand over it, not to mention SEEING it after the first blocking. So these panels took a fair bit more effort to get flat than I had anticipated

This brought me up to Wed night last week. Again, I was spending from about 5 in the afternoon after work to about 10 at night every night that week working on this. I actually completed the final sand on the hood and trunk at 5am on Thursday! Instead of going to the gym that morning, I woke up and went into the garage and started/finished sanding before work. This is when I knew I had a problem… haha. Well, at least this confirmed I DID have a problem
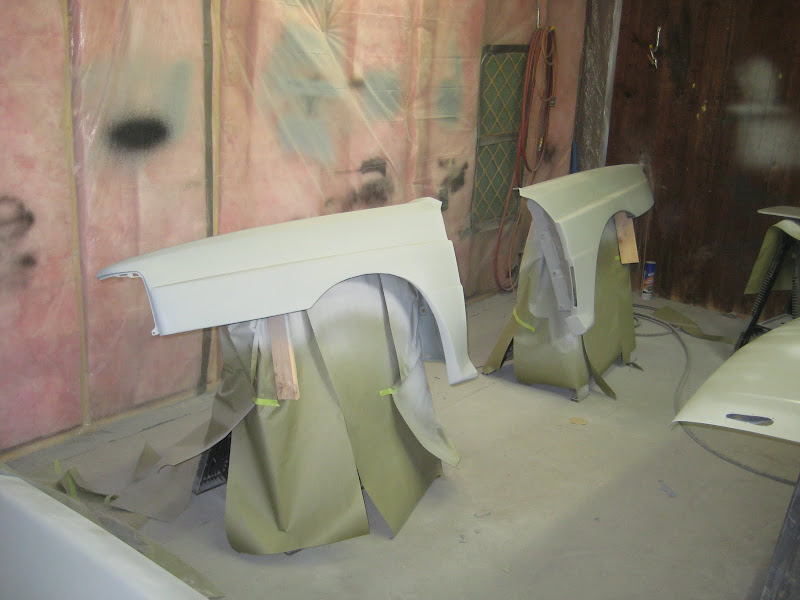
Once I got all the sanding finished, I seam sealed all the cracks/crevices and began the process of taping off the front fenders and undercoating them to help protect the inside fiberglass. I might have gone slightly overboard with it, but I figured I’d rather be safe than sorry at this point.

And undercoating:

And final product:
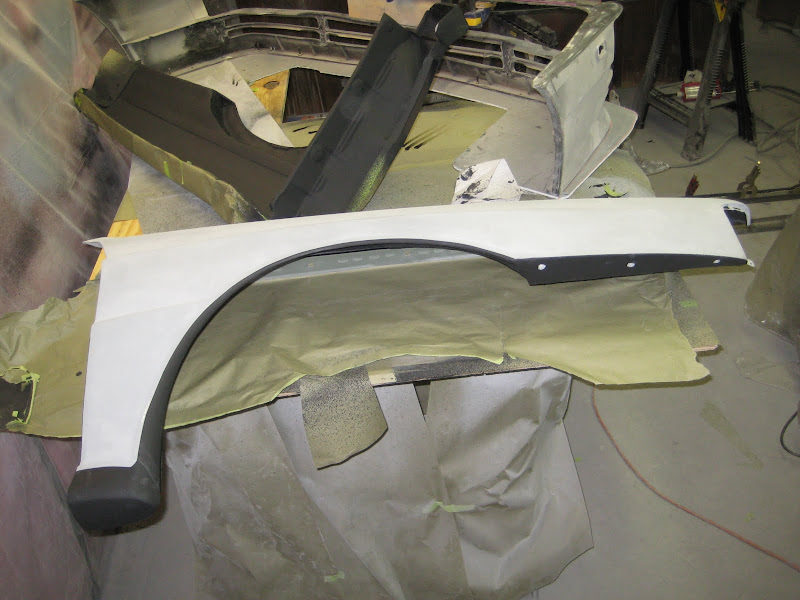
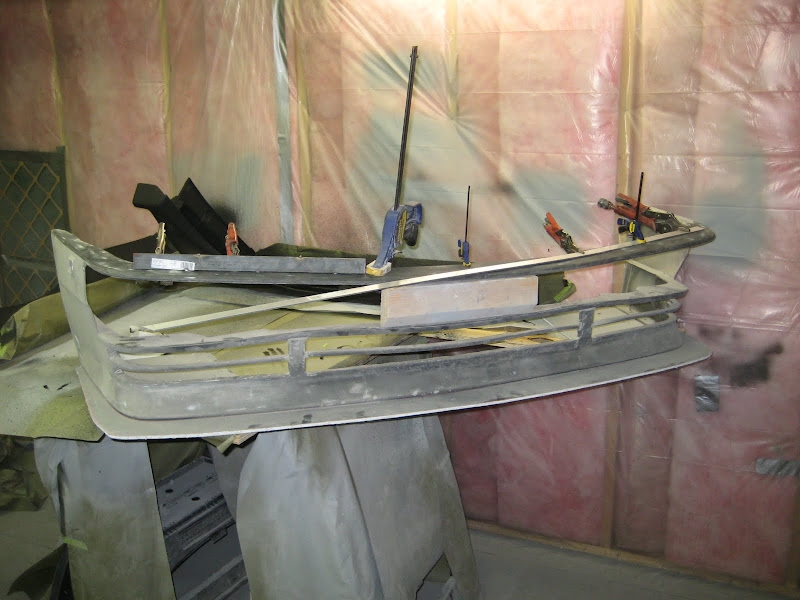
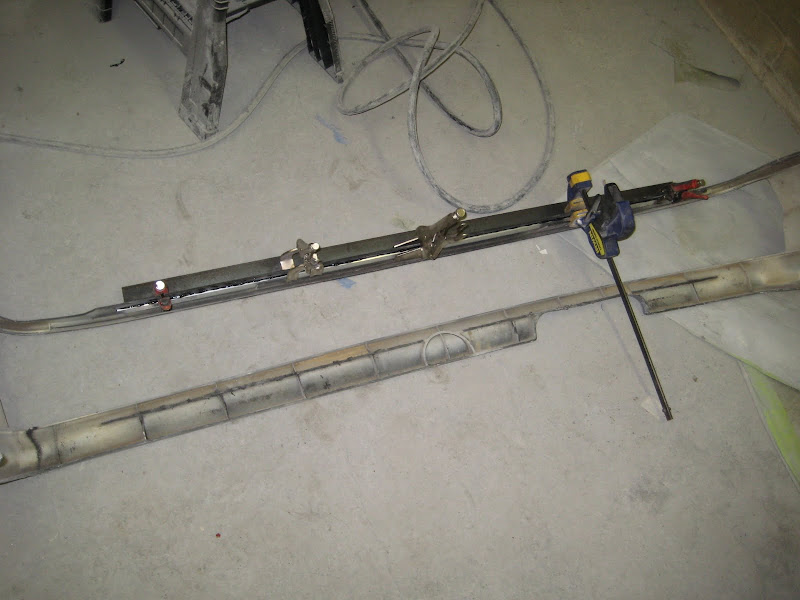
While the front fenders dried, I then began the process of killing off the waves on the bumpers. Unfortunately, 30+ year old bumpers don’t lay as flat as they used to once upon a time, not to mention these things lived a VERY hard life before I got them. In order to rectify this, I decided to glue the skins to the bumper support on the front bumper, plus affixing the “stiffeners” on the front and rear bumpers so they stay as flat as possible.
The waviness of the front bumper cover:

So after a few clamps, a big piece of angle iron, some 3m adhesive and a heat gun, I was able to get everything buttoned up in short order:
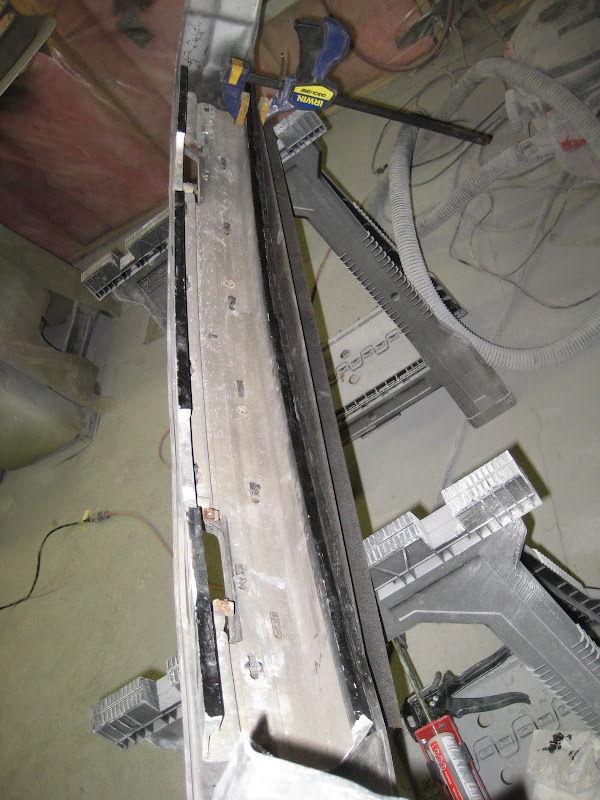
This brought me to about 115am. I had been going hard since about 5ish without really stopping for very long. I wouldn’t have gotten as far as I did w/o the help of Wiley, and a couple other friends, who graciously came over to help me that night with a few things.
Wiley came over and spent about 3ish hours with me trying to get the car started again. We got it close (got the timing zero’d in, etc), but just couldn’t get it running. Made multiple phone calls and tried many different things (thanks to Nate, Derek and Marc!!!), but time wasn’t on our side and I decided to leave it to when the car came home. It wasn’t a game stopper that the car didn’t run for the body shop, and I had a ton of other stuff to handle Thursday night that needed to get done. I believe the car is too rich at this point, but the computer I’m using isn’t capable of exporting the logs to excel, so I can’t read them to look for abnormalities right now. Will tinker with it over the next week or so and see if I can see anything glaringly wrong. The plugs were fouling in about 1-2 min of rough idling (where the car wouldn’t rev at all), so I have a feeling there’s an issue w/ too much fuel at this point.
Friday morning came fast, but I was up at 7am and out in the garage again cleaning up and prepping the car for assembly. By 1030ish, I had the fenders on the car, the rear bumpers installed and the car ready to come out of the garage for the first time assembled………. With a surprise
I have had that CF SQ in my position for over 2 years at this point. I’ve been REALLY itching to use it, but wanted to wait until I had the car finished. I have to say, it REALLY completes the look of the car… and will do so even more once I get paint on the car!
So here are some final shots as she sat… hood installed for the very first time on a car!


To say I was over the moon is PROBABLY an understatement. This has been something I’ve been waiting for since I started this project over 2 years ago.
From there, it was loading onto the trailer (strong battery plus good starter motor = up onto the trailer she goes!):

And off to the body shop she went!
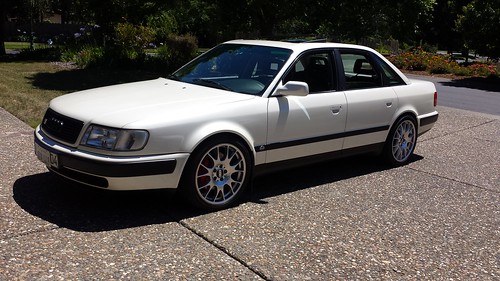
This picture might look a little familiar:

This is what it looked like pre-paint about a year and a half ago when I dropped it off the first time:

And here she rests, waiting to go into her booth. I stripped the doors off the car to make life easier for the shop, and will probably go back to help them reassemble the car and mask things as necessary.

And the doors, hoods, etc waiting in the car’s booth for the next few weeks:

Apparently I picked a great time to send the car in, as things are slow at the shop right now, so I might see the car back in as fast as 2 weeks!! I’d be happy to see it back in a month, but we’ll see how it works out. I just want them to take their time and get it handled right. The shop manager promised to take a few pictures and send me updates from time to time, but I might make a venture out at the end of the week just to check in on the ‘ol girl. It was a very joyful moment for me, I won’t lie to you. On the drive back home I could just feel myself decompress from the hell I put myself through over the past few weeks. It is one more thing off my check list, and I can’t WAIT to start using my car again!
Oh, and I know a few of you are probably going to be asking me what color… and I’m going to hold out on you for a bit longer . It’s in the VAG family, and will be an Audi or Porsche color. I actually wasn’t able to make my mind up when I dropped the car off on Friday, and sent my final choice in on Sunday to the shop. Needless to say, I’m very excited to see what it looks like once I’m done!
So that’s about it for now… pics show the progress, but don’t even touch on the hours invested at this point! Now it’s in the hands of the pros, and I eagerly await its completion! Though I will admit, it was a very strange feeling handing the car off to someone else at this point. I’ve been in 100% control of everything done to the car, and it’s weird for me to hand over the reins, even though it’s the right thing to do in order to get the quality paint job I’m looking for.
So that’s it for now! I will update when I have updates to give. Until then, I will enjoy having an empty garage for once!
Over the past 2-3 weeks, I’ve been really pushing along trying to get the 4000 done and ready to go to the body shop by March 8th. This was a self-imposed deadline I made for myself in hopes of getting it painted and reassembled to make our PCC-ACNA event at VIR in April. I’m still unsure if I will actually be able to get the car together by then, but I will at least go down swinging if not fully successful.
So a few weeks ago, I finally was able to finish rebuilding the rear suspension and remove a few of the “weak links” that were causing me issues in the rear suspension with the axle nuts loosening on track and causing a very loose wheel when rounding the track (and even happened on the street too). Once I was able to get that complete, I went about attempting to get the car running on its new 034 Ic ECU. Unfortunately, after many attempts, many hours on the phone trouble shooting, and many hours tinkering w/ the ECU we were unable to get the car up and running… so unfortunately, the car is still running on foot power vs. real horse power, but not the end of the world.
After I gave up trying to get it running the first time, my cousin and I pushed the car out of the garage so I could start prepping to paint the remainder of the removable parts. I will not lie, I was a little excited to see the car finally out of the garage and primered:
But once she was out of the “paint booth” and into the adjacent bay, it was game time. Since I didn’t have enough saw horses (not to mention space) to paint everything at once, I worked in two stages. First stage was to paint all the doors, as I knew these were going to require a *bit* more work than the other panels (or so I thought).
Started off with roughing everything up and cleaning the metal of any surface rust that has formed in the year plus they’ve been sitting as bare metal:
And then a masking I went so I didn’t get an immense amount of overspray on the non-bare metal areas. The backsides of the panels will be addressed by the body shop, but no sense making their job more difficult by covering everything w/ overspray!
First coat of paint went on nice and easy,
And then a blocking I went. Doors ended up taking 3 coats of primer. I actually got a LOT quicker than I was with the car body (practice makes perfect I guess), and was able to finish the doors off in about a weeks time, working 3-4 hours a night on most nights. There were a few high/low spots, but overall it really wasn’t terrible thankfully. The time I put into getting everything flat w/ the filler really paid off.
And the backsides of the rear doors where I blended the flares:
And the bottom (hard to tell it wasn’t there to begin with at this point!!)
And after the doors were done, I employed the wife to come out on a blistery Sunday afternoon at the beginning of last week and help me mount the doors (so they didn’t get knocked over and damaged after I spent so much effort on them):
She’s taking shape!!!
From this point, we come to the beginning of last week. This was a marathon crunch for me, spending between 6 and 10 hours a day sanding, painting, cleaning, filling, sanding, painting, cleaning, painting and sanding!!! I am grateful I have an EXTREMELY patient wife, as she basically didn’t see me last week so I could meet my March 8th deadline. While I was tired and ready for the car to be gone the week before, I was REALLY ready for it to be gone now… I was drained.
But I still had work to do, so in went the fenders, hood and trunk!
And after a bit of sanding and cleaning, on went the paint!
And then a blocking I went one more time:
Unfortunately, a lot of the stamped metal (untouched by me) had a lot more dips than I had anticipated. The hood was a real PITA (as expected w/ large flat surfaces). Also, the tops of the fenders also had a fair bit of waving going on in it that wasn’t detectable by the eye, but you really felt it when running your hand over it, not to mention SEEING it after the first blocking. So these panels took a fair bit more effort to get flat than I had anticipated
This brought me up to Wed night last week. Again, I was spending from about 5 in the afternoon after work to about 10 at night every night that week working on this. I actually completed the final sand on the hood and trunk at 5am on Thursday! Instead of going to the gym that morning, I woke up and went into the garage and started/finished sanding before work. This is when I knew I had a problem… haha. Well, at least this confirmed I DID have a problem
Once I got all the sanding finished, I seam sealed all the cracks/crevices and began the process of taping off the front fenders and undercoating them to help protect the inside fiberglass. I might have gone slightly overboard with it, but I figured I’d rather be safe than sorry at this point.
And undercoating:
And final product:
While the front fenders dried, I then began the process of killing off the waves on the bumpers. Unfortunately, 30+ year old bumpers don’t lay as flat as they used to once upon a time, not to mention these things lived a VERY hard life before I got them. In order to rectify this, I decided to glue the skins to the bumper support on the front bumper, plus affixing the “stiffeners” on the front and rear bumpers so they stay as flat as possible.
The waviness of the front bumper cover:
So after a few clamps, a big piece of angle iron, some 3m adhesive and a heat gun, I was able to get everything buttoned up in short order:
This brought me to about 115am. I had been going hard since about 5ish without really stopping for very long. I wouldn’t have gotten as far as I did w/o the help of Wiley, and a couple other friends, who graciously came over to help me that night with a few things.
Wiley came over and spent about 3ish hours with me trying to get the car started again. We got it close (got the timing zero’d in, etc), but just couldn’t get it running. Made multiple phone calls and tried many different things (thanks to Nate, Derek and Marc!!!), but time wasn’t on our side and I decided to leave it to when the car came home. It wasn’t a game stopper that the car didn’t run for the body shop, and I had a ton of other stuff to handle Thursday night that needed to get done. I believe the car is too rich at this point, but the computer I’m using isn’t capable of exporting the logs to excel, so I can’t read them to look for abnormalities right now. Will tinker with it over the next week or so and see if I can see anything glaringly wrong. The plugs were fouling in about 1-2 min of rough idling (where the car wouldn’t rev at all), so I have a feeling there’s an issue w/ too much fuel at this point.
Friday morning came fast, but I was up at 7am and out in the garage again cleaning up and prepping the car for assembly. By 1030ish, I had the fenders on the car, the rear bumpers installed and the car ready to come out of the garage for the first time assembled………. With a surprise
I have had that CF SQ in my position for over 2 years at this point. I’ve been REALLY itching to use it, but wanted to wait until I had the car finished. I have to say, it REALLY completes the look of the car… and will do so even more once I get paint on the car!
So here are some final shots as she sat… hood installed for the very first time on a car!
To say I was over the moon is PROBABLY an understatement. This has been something I’ve been waiting for since I started this project over 2 years ago.
From there, it was loading onto the trailer (strong battery plus good starter motor = up onto the trailer she goes!):
And off to the body shop she went!
This picture might look a little familiar:
This is what it looked like pre-paint about a year and a half ago when I dropped it off the first time:
And here she rests, waiting to go into her booth. I stripped the doors off the car to make life easier for the shop, and will probably go back to help them reassemble the car and mask things as necessary.
And the doors, hoods, etc waiting in the car’s booth for the next few weeks:
Apparently I picked a great time to send the car in, as things are slow at the shop right now, so I might see the car back in as fast as 2 weeks!! I’d be happy to see it back in a month, but we’ll see how it works out. I just want them to take their time and get it handled right. The shop manager promised to take a few pictures and send me updates from time to time, but I might make a venture out at the end of the week just to check in on the ‘ol girl. It was a very joyful moment for me, I won’t lie to you. On the drive back home I could just feel myself decompress from the hell I put myself through over the past few weeks. It is one more thing off my check list, and I can’t WAIT to start using my car again!
Oh, and I know a few of you are probably going to be asking me what color… and I’m going to hold out on you for a bit longer
So that’s about it for now… pics show the progress, but don’t even touch on the hours invested at this point! Now it’s in the hands of the pros, and I eagerly await its completion! Though I will admit, it was a very strange feeling handing the car off to someone else at this point. I’ve been in 100% control of everything done to the car, and it’s weird for me to hand over the reins, even though it’s the right thing to do in order to get the quality paint job I’m looking for.
So that’s it for now! I will update when I have updates to give. Until then, I will enjoy having an empty garage for once!

Re: Justin's '85 4000 20vt Project: Got sex'd by an UrQ?
I can't wait to see how it turns out!!!
-Ben-

-1985 Audi 4kq: Xona 7164 AAN 488whp- -2009 Audi A4 -
-1985 Audi 4kq: Xona 7164 AAN 488whp- -2009 Audi A4 -
Re: Justin's '85 4000 20vt Project: Got sex'd by an UrQ?
Freaking awesome Justin. I can't wait for this thing to be romping. Let me know when you get it back and need more help on the Ic getting it running. I'd love to help.
That SQ hood really did complete the project. I need to get me one of those. Fiber Images hood?
Hank
That SQ hood really did complete the project. I need to get me one of those. Fiber Images hood?
Hank
Re: Justin's '85 4000 20vt Project: Got sex'd by an UrQ?
such an epic project justin...can't wait to see it done!!
Ed
Re: Justin's '85 4000 20vt Project: Got sex'd by an UrQ?
Thanks, guys!
Hank, I honestly am not sure who made the hood. IIRC, it MIGHT be a FI hood, but I don't remember 100%. I bought it from a fellow QW'er who had it for his CGT, but never installed it. He traded Ben Swann his old 5000 (I think) for it... lol.
Will def touch base with you on tuning if need be. Wiley and I were really scratching our heads, but did a little dance when we found TDC after tweaking the ECU. Marc was able to add more guidance, but the limitations of my computer kind of stopped us dead at that point. Was kind of hoping I'd be able to output the GRAPH as well as the data, but wasn't the case. And I'm too green with this crap to know what I was looking for otherwise... lol.
Re: Justin's '85 4000 20vt Project: Got sex'd by an UrQ?
Yeah. I hear you. Wiley sounded like the computer was needing an upgrade along with some Excel action.
Re: Justin's '85 4000 20vt Project: Got sex'd by an UrQ?
How much more life does the 20vt have in it?
Re: Justin's '85 4000 20vt Project: Got sex'd by an UrQ?
Yeah, computer is a circa 2003 model? I can't get it to connect to the internet via the wireless card (external) anymore. It's essentially my VAG tool and ECU tuning tool.
Time to find a USB to Serial adapter and update parallels on my macbook pro and just start using that now. Would make life a lot easier I think, plus I can hot link it to my phone and have instant wireless whenever I need!
I will bring the other computer inside though and input my logs into a google spreadsheet and post up what I found though and hopefully with all your help get it running again.
20vt will be in the car for a while... lol. I have a spare 20vt from our S6 I toy with building/upgrading, but given that it's taken me 2 years to get to this point w/ the car, I want to drive it for a while! Might consider a separate motor build, but the head has some cracks around the spark plug holes I have to look into to see if I can make it useable again or not. For now, I need to get it running so I can take her out on the track again. I have a 2.2bar spring now, and want to push boost to around 25psi or so and just enjoy it for a bit. Might need to go visit Marc to get tuning though, since I can't seem to find a good tuner down near DC.
Re: Justin's '85 4000 20vt Project: Got sex'd by an UrQ?
Justin - looks great, getting close!
I hope you gave them the bumper plugs
I hope you gave them the bumper plugs
Re: Justin's '85 4000 20vt Project: Got sex'd by an UrQ?
lo,, thanks Mike!
Yes, I DID give them the bumper plugs!!! Hopefully they don't LOSE the bumper plugs!
Also, will email you, but we need rears for our UrQ. Ours kind of crumbled when I took them out of the bumper... lol. GO figure!
Yes, I DID give them the bumper plugs!!! Hopefully they don't LOSE the bumper plugs!
Also, will email you, but we need rears for our UrQ. Ours kind of crumbled when I took them out of the bumper... lol. GO figure!
Re: Justin's '85 4000 20vt Project: Got sex'd by an UrQ?
Shoot me your address and I will try and get a set of rears in the post tomorrow, I think have
a few of them left. Cheers, Mike
a few of them left. Cheers, Mike

Re: Justin's '85 4000 20vt Project: Got sex'd by an UrQ?
This thing is awesome! Can't wait to it painted!
Darin
1989 80 20vt
1989 80 20vt
Re: Justin's '85 4000 20vt Project: Got sex'd by an UrQ?
How big of tires do you think you stuff?
Re: Justin's '85 4000 20vt Project: Got sex'd by an UrQ?
Hank,
I can fit 275 hoosier slicks in the rear (look a couple pages back) with ease. The fronts I'm limited to 245s I think (need to try a set on from a friend who runs them on his GTS2 M3) b/c of the steering arms. I already clocked them in slightly, but they'd need more since the wheel wouldn't sit flush on the hub... lol.
I run 235s front/rear currently and have zero clearance issues. And honestly, that's all the car really needs at this point in time given the power its outputting. That might change down the road, but w/ 225 hoosier slicks on the car, it's like a friggen go-cart!
Re: Justin's '85 4000 20vt Project: Got sex'd by an UrQ?
Yeah, 245 R comps are pretty wide, but I can fit 245 R comps on my URQ without even trying hard. I am not rotated either. 35mm offset 17x8.5s. What offset are you trying?
Re: Justin's '85 4000 20vt Project: Got sex'd by an UrQ?
With OZ SL rims (et35 and ~8" wide I believe) and the arm rotated in, I need to run a ~12mm spacer to keep the tire off the upright.
Mind you, I think the biggest difference b/n the two setups is that the offset of the UrQ hub is greater than on my 4000 right now (5000 hubs w/ bearing spaced out of assembly as much as possible) as I have to backspace the A4 boxster brackets off the upright (~1/8-3/16") in order for it to line up w/ the D2 A8 rotors, while the A4 stuff bolts directly to the UrQ uprights w/o a single offset issue and the same setup. That is probably why you can clear everything w/o moving/rotating the arm at all.
The rears are wide open w/o a single issue though, and there's plenty of room on the fronts to fit the wider tire, it's just an issue w/ upright interference vs. fender interference.
My fenders are around 3/4" to 1" bigger than on an UrQ, or at least that's what I added to the fiberglass UrQ flare in order to gain the necessary clearance.
Re: Justin's '85 4000 20vt Project: Got sex'd by an UrQ?
So it's been a while since I've last updated, and that's moreso b/c there hasn't been much to update. Unfortunately, after masking off the car and prepping the bumpers/hood, they shop ended up getting a lot of "production work," forcing this to take a little bit of a back burner. I ended up paying them a visit to drop off my wife's car that was sideswiped, and chatted with the manager. Picked her car up last week, and sorta teased him a bit about how it was finished before my 4000. Suddenly I got an onslaught of photos from the manager and they managed to get some time to spray some COLOR on the 'ol girl!!!
From the beginning, I was pretty secretive on the color choice before sending it to the body shop b/c I was really torn on color choices, and didn't need/wante anyone elses opinions to sway my own. Never had this hard of a time making a decision (I'm normally very quick to make a choice and move on), but was really having a tough time. I had limited it down to two colors, an Audi RS4 dark charcoal metallic (which was a shade darker than the original color of the car) or Porsche ruby red (found on Panameras, 911s, etc).

From the get go, I had my heart set on a dark charcoal color, but the more and more I looked at the colors I had chosen, the harder a choice I had to make. Each color had its own pluses and minuses. The Audi color just screamed when the sun hit it. The metallic flake in that paint was unreal. Unfortunately, from a distance, it looked black. The Porsche color on the other hand really shined in all instances, but didn't quite pop compared to the charcoal (the red is a pearl-effect metallic, so it doesn't have quite as much flake in it).
I even went as far as to have my cousin photoshop the colors onto a picture of the 4000 fully assembled to help me make my decision! And even with the photoshopped pictures, I couldn't quite make up my mind. What it did show me though was that the red really showed off the lines of the car, while the charcoal kind of hid them. In the end, neither color was the wrong choice.... but I made my choice. Might not be the liking of some, but in the end... my car! When I saw these pictures, it actually made me openly giggle (and I'm not ashamed to admit it!). I actually had a hard time going to sleep that night b/c of the excitement. I have weak hopes the car might be done this week, but we'll see. I openly told them not to rush to get it done (and make mistakes), but didn't want this to take a back burner anymore if they can help it. This will be a representation of their work as much as mine, so it's in both our interest to make it done right!
But my Thursday morning started off with this picture:

And then followed by these in the evening...
base coat w/ no clear:

And cleared!


The last picture is a better representation of the color than the first two. Lighting was bad, so the first two make it look a LOT darker than it really is. I wasn't really leaning towards a red car at first, but the more and more I looked at the color... the more I couldn't get it out of my head! I didn't want fire engine red, and I think this was a great compromise! Also, was good to hear a compliment from the body shop on how well I did w/ the bodywork. There wasn't a single wave in any of the stuff they sprayed thus far. That email felt pretty damn good, I won't lie to you!
Will share more as I know more... until then, enjoy. I look at these pictures daily at this point. Can't WAIT to get this thing home!
From the beginning, I was pretty secretive on the color choice before sending it to the body shop b/c I was really torn on color choices, and didn't need/wante anyone elses opinions to sway my own. Never had this hard of a time making a decision (I'm normally very quick to make a choice and move on), but was really having a tough time. I had limited it down to two colors, an Audi RS4 dark charcoal metallic (which was a shade darker than the original color of the car) or Porsche ruby red (found on Panameras, 911s, etc).
From the get go, I had my heart set on a dark charcoal color, but the more and more I looked at the colors I had chosen, the harder a choice I had to make. Each color had its own pluses and minuses. The Audi color just screamed when the sun hit it. The metallic flake in that paint was unreal. Unfortunately, from a distance, it looked black. The Porsche color on the other hand really shined in all instances, but didn't quite pop compared to the charcoal (the red is a pearl-effect metallic, so it doesn't have quite as much flake in it).
I even went as far as to have my cousin photoshop the colors onto a picture of the 4000 fully assembled to help me make my decision! And even with the photoshopped pictures, I couldn't quite make up my mind. What it did show me though was that the red really showed off the lines of the car, while the charcoal kind of hid them. In the end, neither color was the wrong choice.... but I made my choice
But my Thursday morning started off with this picture:
And then followed by these in the evening...
base coat w/ no clear:
And cleared!
The last picture is a better representation of the color than the first two. Lighting was bad, so the first two make it look a LOT darker than it really is. I wasn't really leaning towards a red car at first, but the more and more I looked at the color... the more I couldn't get it out of my head! I didn't want fire engine red, and I think this was a great compromise! Also, was good to hear a compliment from the body shop on how well I did w/ the bodywork. There wasn't a single wave in any of the stuff they sprayed thus far. That email felt pretty damn good, I won't lie to you!
Will share more as I know more... until then, enjoy. I look at these pictures daily at this point. Can't WAIT to get this thing home!