Where might one find this image?cbrydon wrote:Got a new image to put in one of the frames in my office. I seem to be easily distracted this week.
*Many thanks goes to Roger on quattroworld for supplying the source image.
An Alpine URQ in Utah - Knee deep in Swarf
-
Nedry
Re: An American URQ in Utah - The Beginning
Re: An American URQ in Utah - The Beginning
:stupid: What he said!Nedry wrote:Where might one find this image?cbrydon wrote:Got a new image to put in one of the frames in my office. I seem to be easily distracted this week.
*Many thanks goes to Roger on quattroworld for supplying the source image.

Re: An American URQ in Utah - The Beginning
For now, you can have these...
Full Resolution Versions Here:
URQ Print Whitened
URQ Print Blueprinted
Full Resolution Versions Here:
URQ Print Whitened
URQ Print Blueprinted
-
waxcoupe
Re: An American URQ in Utah - The Beginning
voted and almost first!!!!!
Re: An American URQ in Utah - The Beginning
With recent spell of the cold weather and travel over the Holidays, progress actually out in the garage is pretty non-existent. Moving on much of the original urq parts has taken a lot of time and effort, especially as most all needed to be shipped out.
Pulling the drivetrain and suspension.
Some parts ready to go out.
With many of the parts gone, there is now some more room to move around out there and continue to strip and clean up the shell. I would like to reclaim the electronics area of the garage which has been demoted (or promoted?) to urq interior storage.
A bit more pieces to be removed (steering rack and final bits of harness), a full cleaning, and then fixing the random dings and dents around the body. Plan is to respray individual sections/panels and get it looking ‘pretty good’ as revision 1.
In my attempts to draw attention away from less than stellar paint, I like to play with decals.
Some of them are a bit small due to the limitations of my cutter (6.2” max. width), but I’m not trying to make a painstaking replica. Besides, if you really look at the factory decals on these cars over the years, the styles and sizes are really quite variable. You can target individual cars, but the similarity pretty much stops there.
Some of the artwork I had from a vector art collection I had purchased many years ago for another project, and some I re-created by tracing over bitmap examples pulled from the Web.
I picked up a new [to me] steering wheel off of the s2forum a couple months ago.
Nardi, yes!
It came with a second wheel rim, as the original rim is bit knackered.
The plan is to first try to fix the leather with some type of ‘product’ aimed at doing so. If that doesn’t work so well, then I’ll look into reskinning them.
I guess I should worry about an engine before the steering wheel and decals? :slap:
-
Highlander
Re: An American URQ in Utah - The Beginning
Looking great.
What a clean car to start with.
Keep the updates coming.
Cheers,
Craig
What a clean car to start with.
Keep the updates coming.
Cheers,
Craig
-
sepp
Re: An American URQ in Utah - The Beginning
I totally agree! Great foundation for such a project.
Best of luck!
Best of luck!
-
Frank the quattro tank
Re: An American URQ in Utah - The Beginning
Not to nitpick, but weren't Mouton and Mikkola both drivers? I didn't think that either one was a co-driver.
Re: An American URQ in Utah - The Beginning
Frank the quattro tank wrote:[/quote]Not to nitpick, but weren't Mouton and Mikkola both drivers? I didn't think that either one was a co-driver.[/quote]
Not sure where I said either was a co-driver, but yes, both drivers. I have made artwork for most of the more popular/successful drivers/co-drivers, but only cut a few sets for samples. That is what you are looking at.
So, before someone helps me spell W. ROERHL correctly...that is the correct spelling on the early cars before they used the O with the umlaut.
Re: An American URQ in Utah - The Beginning
Finally got a little of the white stuff flying, but we’re still way behind. This was part of about 30” that came down over two days last week. Still way behind for the year, though. Still not ready to switch from the ‘rock skis’ yet as it is still pretty thin in spots.
And then I made for a little garage time too. I needed to disassemble the uprights as they are sold and I wanted the hubs.
So I had a pile of assemblies to start.
The axle nuts required some heat to be persuaded by my wimpy li’l Husky impact gun. The axles just slide right out with the nut removed.
Then I needed to remove the strut inserts from the uprights. Throw them in the vice.
And I usually use a pipe wrench to take the caps off. Some slight marring, but nothing major if you’re careful.
Then I needed to press the hub from the bearing/housing. Part of my Harbor Freight collection of rarely used and subsequently fairly long lasting tools.
Here are the urq hubs, fronts on the left; rears on the right.
And next to a machined urs hub. Notice the different spline count—urS on the left; urQ on the right.
On Friday, I was just checking the inventory of the local yards, and found the PnP had an 80 and a 90 just in. I stopped in Saturday afternoon with some tools.
Nice day at the yard…Sunny and about 40F. And no painfully stubborn bolts. Just a bit slow due to the slightly less than half turn dance with the strut socket and hex key while sideways in the trunk.
These two bolts were cake.
I was able to get a set of the 2 pc rear uprights from the 80. These will be used for the DIY coilovers/2 pc conversion.
I now have most of the pieces for the suspension together; still after a rear set of bearing housings/knuckles.
Q: Anyone have some good suggestions on springs and dampers for a 4-500whp street/track setup?
An American URQ in Utah - The Beginning
Looks like some decent progress there Chris. Anything else worth pulling from the 80/90 there at pnp?
Re: An American URQ in Utah - The Beginning
Nothing great, but some useful bits...both interiors are generally trashed.nsimps wrote:Looks like some decent progress there Chris. Anything else worth pulling from the 80/90 there at pnp?
The '89 80 quattro has a good black dash, manual climate box, good looking vacuum booster. The entire drivetrain is still there...
The '94 90 has full B4 parts (hood/grill/lights), digital climate and black dash with airbag...full engine bay of parts...B4 vacuum/ABS setup...strut bar...
I pulled the b4 headlight connectors as they are always useful and worth a little $.
Re: An American URQ in Utah - The Beginning
A little more catching up on some past progress.
Early last summer, around May or so, I started pulling the engine from the urq. As mentioned before, this experience was a major deciding factor in going 20VT. Anyway, here are some pics of a few days of wrestling parts free, and pulling the head out the top. The block ended out coming from the bottom with the subframe and tranny.
Everything’s there.
These were the open valves while sitting for all those years…
And the block…
Finally pulling the head after a tedious partial disassembly.
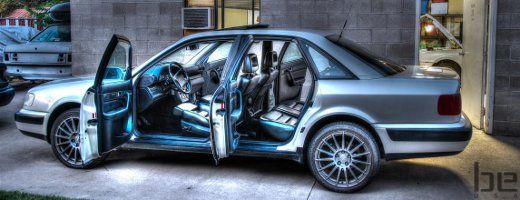
Around June, I started pulling the interior to prep for the rewiring of everything. The carpets on so many of these have turned this blueish color.
Sun-fade and UV damage…
I picked up a minty brown 4K carpet from the ‘yard two summers ago that will work in place of this crumbling mess…
There was a major unattended leak that put quite a bit of fluid into the footwell and soaked the padding. It can’t all be good news, right.
Removing the padding.
I used a scotchbrite pad and water to remove what was left. Then, I scraped up the softened sound deadening material.
It showed some surface corrosion along the seam where the seam sealer had also deteriorated from the fluid. I hit it with a flap wheel.
And threw some primer on there for now.
It will need some seam sealer and I’ll probably just lay some dynamat back down where I pulled the layer. Not really interested in removing all of the coatings from the shell at this stage.
And the original ’83 fusebox with the supporting ‘mods.
In August, I honed the AAN block…with some dingleberries
With a calculated stroking motion and calibrated index finger for rpm, I put on a perfect crosshatch. You can notice there is a visible ridge on the walls. I will hone this block a bit more and see how it mics out, but plan on using it without reboring, along with the original pistons and new sets of rings.
In October, I picked up a ’87 4Kq that I needed some parts from.
I needed a few wires; so out comes the harnesses…
I needed the driveshaft; so out comes the drivetrain….
But, then I needed to move it; in comes the dollies...
And the fusebox/flange will be used as well…
So now I have this 4kq shell and a bunch of parts that I need to get rid of…
Now, I’m mostly caught up on the work done, but can probably update on all of the purchased and gathered parts for the build. I really want to get started building the suspension.
I will be doing something along these lines...
http://www.motorgeek.com/viewtopic.php?f=11&t=26499
Thinking about 350lb front/400lb rear 8” springs…maybe 7” if 8” isn’t low enough…but, dampers..not sure there…I need to do more research.
Need more input, Stephanie.
Early last summer, around May or so, I started pulling the engine from the urq. As mentioned before, this experience was a major deciding factor in going 20VT. Anyway, here are some pics of a few days of wrestling parts free, and pulling the head out the top. The block ended out coming from the bottom with the subframe and tranny.
Everything’s there.
These were the open valves while sitting for all those years…
And the block…
Finally pulling the head after a tedious partial disassembly.
Around June, I started pulling the interior to prep for the rewiring of everything. The carpets on so many of these have turned this blueish color.
Sun-fade and UV damage…
I picked up a minty brown 4K carpet from the ‘yard two summers ago that will work in place of this crumbling mess…
There was a major unattended leak that put quite a bit of fluid into the footwell and soaked the padding. It can’t all be good news, right.
Removing the padding.
I used a scotchbrite pad and water to remove what was left. Then, I scraped up the softened sound deadening material.
It showed some surface corrosion along the seam where the seam sealer had also deteriorated from the fluid. I hit it with a flap wheel.
And threw some primer on there for now.
It will need some seam sealer and I’ll probably just lay some dynamat back down where I pulled the layer. Not really interested in removing all of the coatings from the shell at this stage.
And the original ’83 fusebox with the supporting ‘mods.
In August, I honed the AAN block…with some dingleberries
With a calculated stroking motion and calibrated index finger for rpm, I put on a perfect crosshatch. You can notice there is a visible ridge on the walls. I will hone this block a bit more and see how it mics out, but plan on using it without reboring, along with the original pistons and new sets of rings.
In October, I picked up a ’87 4Kq that I needed some parts from.
I needed a few wires; so out comes the harnesses…
I needed the driveshaft; so out comes the drivetrain….
But, then I needed to move it; in comes the dollies...
And the fusebox/flange will be used as well…
So now I have this 4kq shell and a bunch of parts that I need to get rid of…
Now, I’m mostly caught up on the work done, but can probably update on all of the purchased and gathered parts for the build. I really want to get started building the suspension.
I will be doing something along these lines...
http://www.motorgeek.com/viewtopic.php?f=11&t=26499
Thinking about 350lb front/400lb rear 8” springs…maybe 7” if 8” isn’t low enough…but, dampers..not sure there…I need to do more research.
Need more input, Stephanie.
-
Drift Mc
Re: An American URQ in Utah - The Beginning
Is it just me or did I not see a coilover setup on the car you broke for parts, why not use them?
Re: An American URQ in Utah - The Beginning
Drift Mc wrote:[/quote]Is it just me or did I not see a coilover setup on the car you broke for parts, why not use them?[/quote]
It had coilovers, but those were previously sold (along with spindles and wheels) and one reason I got the car for next to nothing.
It also had a TORSEN 016 and a 'beastly' 20vt with porting and reground cam that did come with the car. Sad history with this car.
And they were the one piece uprights too; I'm pretty set on the two piece approach.
-
a_CQ
Re: An American URQ in Utah - Still Kinda The Beginning
You'll probably be ok with those spring rates. You could go higher, but I wouldn't without some better shocks. Have you looked into KWs since you're going 2-piece? Sure, a little more $$ but well worth it in the end, IMO.
Re: An American URQ in Utah - Still Kinda The Beginning
When you say better, I assume you mean better than aftermarket sport offerings that will have damping characteristics for springs in the 300 lb range. No original 72K stockers being used here.a_CQ wrote:You'll probably be ok with those spring rates. You could go higher, but I wouldn't without some better shocks. Have you looked into KWs since you're going 2-piece? Sure, a little more $$ but well worth it in the end, IMO.
I would like something adjustable, like a Koni, I guess. I don't need anything crazy with remote reservoirs or anything though. I would want them valved appropriately for the spring rates I'm after.
I've thought about KW's, but half the fun for me is building this stuff, so I like the DIY setup. In the end, I think I'll have something better suited and a bit more customized (rotated/moved steering arm, etc.) with my own. And probably half the cost of the KW's.
Do the KW's use Koni inserts?
Also, wasn't there something weird about being able to order them for the urq? Like there wasn't an off-the-shelf kit, and had to be mix and matched, and suppliers didn't want to do it?
-
a_CQ
Re: An American URQ in Utah - Still Kinda The Beginning
No sport springs are in the 300lb-in range. Try more like ~200. Stock springs are 115-125lbs-in.
Bilstein/Koni are ok for up to ~400lbs-in springs as far I have read around, and in talking with Bilstein's main rebuilder. Yes, they can be revalved, but that can add up too. Konis do have rebound adjustment, but it's pretty limited.
KW's build their own shocks AFAIK, nowadays they are built as single unit vs. reusing your old strut housings. Since you're going 2-piece struts, you can just buy coupe quattro(90-91) setup. Perhaps there was some limitation when trying to build a set as one-piece for the UrQ, that I don't know.
When you add up the cost of struts, shocks, revalving, springs, sleeves, perches, your time, etc, KWs are really not that much more. But I understand the desire to DIY and save $$. For 99% of people DIY coilovers for these cars are just fine.
Re: An American URQ in Utah - Still Kinda The Beginning
Thanks for the info on rates. I was just thinking the Billies/Konis were maxed out around 300 lb-in.
And yeah, brainfart...the whole point to half of this switchover is so I CAN use later suspension bits and actually buy things if I need to.
So T89 KW's should work in this case.
I guess I'll mull it over for a bit and see what falls out.
And yeah, brainfart...the whole point to half of this switchover is so I CAN use later suspension bits and actually buy things if I need to.
So T89 KW's should work in this case.
I guess I'll mull it over for a bit and see what falls out.
-
a_CQ
Re: An American URQ in Utah - Still Kinda The Beginning
No problem. If anything I've learned over the years in this car hobby is it's better to wait on doing/getting something that you ultimately want...errr, *need* vs. doing something now with thoughts that you will re-do it later. So yeah, think it through, figure out what you want and do just that. Of course, sometimes there are budgets to adhere to, but there are also Ramen noodles 
Re: An American URQ in Utah - Still Kinda The Beginning
Ouch. $2390 for the KW V3's; $1650 for the non-adjustable V1's.
Here is a rough estimate of what it costs to put the coilovers together...
The Koni's only give rebound damping, whereas the KW's are 2-way compression/rebound adjustable.
Here is a rough estimate of what it costs to put the coilovers together...
The Koni's only give rebound damping, whereas the KW's are 2-way compression/rebound adjustable.
Re: An American URQ in Utah - Still Kinda The Beginning
My 1990 CQ had dual adjustable struts but Nate or Christian would have to let us in on what they were.
Re: An American URQ in Utah - Still Kinda The Beginning
Well, sometimes decisions have a way of making themselves. It came to my attention that the coilovers and hubs from the 4K were actually available as the original sale fell through. And being frugal to the point of stupidity, and for the right price, I figured I could make at least pieces of it work. They’ve been neglected and I knew going in that one of the front Konis was blown with a lot of shaft play. In the end, it will either be a killer deal or a good learning experience. It also is using second-hand items which I prefer in this disposable world we now live in. Reduce. Reuse. Recycle.
Yes, they are in need of a little help.
It’s nice to have options when you’re building stuff.
The coilovers were built from a 4Kq Ground Control kit with Eibach springs (2x GC200.64.77 – these are a metric spec spring with specs near 8”L; 2.5”ID; 450lb/in and 2x 0800.250.0500 – these are a standard spring with specs of 8”L; 2.5”ID; 500lb/in). These are stiffer than I wanted, but beggars can’t be choosers sometimes. I am unclear as to why the one pair is metric but they were the ones on the rear and are a bit larger diameter. This is possibly a choice to clear the larger top cap on the rear strut housings.
One problem is that I want a bit stiffer in the rear to help with the understeer, but this wouldn’t work out that way. I’m hoping to trade the 500’s for some 400’s and then keep the original 450’s in the rear. I think that would be the ideal first choice.
They also came with adjustable Koni Yellows-small diameter top adjust units for the front and the remove-to-adjust large diameter ones for the rears.
The strut housings were 2-piece fronts with 82mm bearing housings and the rears were the 1-piece units. I had planned on 2-piece, so I figured I was halfway there already with this setup. There was also a full set of 5 lug hubs and axles that I could make use of…or at least pieces here and there.
I’m still trying to get my head around the whole tranny/axle/hub/cv/diff size matching game and deciding what the best route is as far as an easily serviceable setup with good parts availability.
In the meantime, I started disassembling and cleaning all of the parts up.
I needed to modify my tool to get a socket in to hold the top of the Koni shaft on the top-adjust damper.
Clearance for the socket.
Sometimes the top caps are a bit of a pain to get off. Some of these were pretty rusty and the fronts had become one with the sleeves as well.
There was little to no clearance on the top caps and they corroded together a bit. It looked they had been ground down to fit the sleeve.
Unfortunately, the sleeves didn’t survive the operation.
That’s too bad as I thought the fronts could be fully usable, but will need to get some sleeves for them. Let’s see what other things didn’t make it.
Three good dampers.
As mentioned before, one of the Konis just wasn’t working quite right. There was a lot of play and…oh, what’s this?...
Hmmm…what happened to the outer tube? Oh there it is.
Interesting….well let’s try and pull that out of there.
So, the question…Is this thing rebuildable? :dur:
I cleaned up the springs a bit, but there is a bit of surface rust and missing paint.
The spring perches cleaned up pretty well. A bit of corrosion on the uppers in areas where the springs were rusting.
And then there were a set of bump stops and two white plastic washers.
One question for the experts, although I think it is going to come down to a matter of personal preference…This is pertaining to the Koni yellows. I’ve seen people switch to the big bore strut housings to allow running a larger diameter damper. But if using what is in the rear, it does not have the top adjuster. So you would lose that.
Then others have actually set it up to run the small diameter dampers with the top adjust on all four corners. So it seems the trade-off is easier adjustability versus a larger damper. Is there a way to get the best of both worlds with Konis? At this point, I think I’ll just buy 1 top adjust small diameter for the front to fill out the set again and call it done for Phase 1.
Now I’ve got to figure out what to put together for the axles/hubs and rear diff for the 01E to be happy. I’ve got early urq axles and hubs…the axles and 5lug hubs from the 4kq (from what I don’t know yet). A 4kq driveshaft…01E mounts…getting there…
Good thing I know a couple local guys with all the answers…
-
audifreakjim

- Posts: 2145
- Joined: Sun Mar 03, 2013 3:00 pm
Re: An American URQ in Utah - Still Kinda The Beginning
Wow, quite the surgery! I sense a little honey badger in the post.  KONI can put the external adjustments on the rear dampers, re-valve the struts, pretty much anything you want, it's just $$$.