Holy baaaaaaaalls this is amazing lol. Sounds so great. Way to go.
Re: URS6 + 4.2T Getting Them Breakin Miles
Posted: Thu Apr 30, 2020 4:17 pm
by Aktapod
So sick! I saw you got some BS on the other site, but thank you for doing something cool and different and sharing it. We'd be stuck with the same cookie-cutter OEM-ish setup if everyone just followed what was "accepted."
Sounds great! Keep it up!
Re: URS6 + 4.2T Getting Them Breakin Miles
Posted: Thu Apr 30, 2020 6:31 pm
by jolio1994
Thanks guys!
I am already in the planning stages of putting it under the hood, which shouldn't be too difficult. This setup has been great though, I've been having a lot of small issues that probably wouldve equated to pulling the engine several times over the past month. With all the extra room however, fixing and tweaking can all be done in the car; which was the whole reason for this from the beginning.
Re: URS6 + 4.2T Getting Them Breakin Miles
Posted: Sun May 03, 2020 9:51 pm
by jolio1994
Photo dump of this crazy build on a beautiful Sunday. I got about 200 miles on today: ears still ringing, but man what a day!
I'm going to fabricate the wastegate up pipe so it sit's flush with the "exhaust". Then it's time to start adding boost.
Re: URS6 + 4.2T Getting Them Breakin Miles
Posted: Tue May 05, 2020 5:50 pm
by jbrentd
Glad to hear things are going well on your build. I bet it’s a hoot.
Re: URS6 + 4.2T Getting Them Breakin Miles
Posted: Wed May 13, 2020 12:31 am
by jolio1994
All of the new schedule 10 304l came in today
Anybody have any recommendations for settings?
60-75 amps
18 cfh with a 3/32 tungsten & #10 cup
This is the setup I really want to last so I want to make sure I'm as spot on as I can be. I noticed a bit of grey area last time using a #8 cup, so I want to maybe try and step it up to a #10, possibly even a #12.
Thanks!
Re: URS6 + 4.2T Getting Them Breakin Miles
Posted: Thu May 14, 2020 7:57 am
by lorge1989
I am not an expert, and have some related experience just messing around at home with my TIG and looking up various techniques.
Personally I have a habit of putting too much current into the part. With SS I have see good welders use slightly less amps, let the puddle form more slowly and then add filler. Be consistent with the current you use when adding filler through the whole part, and back off when moving the torch to the next part. I am not sure on a number for you, but maybe try it on a scrap piece first, dial back your current by 5 or 10 amps and see if you are able to get proper penetration and how it affects the graying you are talking about.
Also, which I'm sure you already know, make sure you back purge the manifold. You don't want the argon seeping out of the joint you are welding so make sure you leave a small opening at the end of the part for the argon to escape. Before you start welding, make sure you let the argon push all the air out of the part, give it time and maybe a slightly higher flow rate. When you are ready to weld, dial it back some, to make sure its not pushing out of your joint and let it rip.
Re: URS6 + 4.2T Getting Them Breakin Miles
Posted: Thu May 14, 2020 10:45 pm
by Afterthought
My welds aren’t perfect either but a few things I’ve noticed is this . . On stainless I use a smaller diameter rod and force more into the puddle to keep it cooler .
also when you think about amps you need to consider amps and heat do correlate but also travel speed is a big part of it as well. For example some people can do schedule 10 at 110 amps with fast travel speed and not overcooking the weld- where others might use 75 amps and sit too long in one spot and end up overcooking it .
Also if you have a welder that can do it on really thin stainless I use pulse mode sometimes but in sch 10 I don’t , it’s good for practicing the rhythm of dip, move, though.
URS6 + 4.2T Getting Them Breakin Miles
Posted: Thu May 14, 2020 10:45 pm
by Afterthought
Oh and the post flow, hold the post flow on for a bit extra . and let the part cool a bit between passes if you do more than one pass or two right next to each other
Re: URS6 + 4.2T Getting Them Breakin Miles
Posted: Fri May 15, 2020 8:05 am
by jolio1994
IIRC I used ~45amps on the 16g 304L piping I did for the current setup. It's really not much, but I know schedule 10 is twice the thickness if not more. Definitely less than the steel counterpart.
Also, my 3/32 308 rods welded like shit, wasnt really able to melt in the puddle, I stepped down to 1/16 and it was worlds better.
I purged last time with the advice others had given me. Essentially starting off at 15-20cfh and stepping down to 3-5cfh. The inside came out better than the outside!!! Lol
Thanks all for the advice; looks like I'll be doing it pretty soon, no sense in keeping this setup since Waterfest is cancelled
Re: URS6 + 4.2T Getting Them Breakin Miles
Posted: Fri Jun 05, 2020 8:08 pm
by jolio1994
Guys... I've been up to no good, for a more "permanent" solution. Just need to get some hardware to bolt the manifold to my 1/2 steel plate to weld tomorrow, then I'll make the driverside manifold and crossover pipe.
I would classify this as “good” haha. Log is looking sweet
Re: URS6 + 4.2T Getting Them Breakin Miles
Posted: Sat Jun 06, 2020 10:04 pm
by jolio1994
Thanks! It came out great and I'm super stoked over it!
Placement is a little more to the left than I wanted for the down-pipe, but it gives me the end goal of where the crossover pipe is going to have to land. I think 2 pie cut 90's + slight grinding and I should be able to clear the down-pipe, but more on that later once the pre turbo piping is done.
Still chipping away... Finished the driverside manifold this morning and immediately moved onto the crossover pipe. What a chore! Tacked up this fitment was perfect, after it was fully welded I was about 1/4" too short at the v-band's for the collector, so close! I'll fix it in the a.m. I guess, then test fit it in the car.
I had to run it high to avoid the coolant radiator feed hose that'll I'll run under the intake manifold as well as give me suffice room to fit the downpipe AND wastegate provision; a little bit more difficult that run running a top mount haha.
Nice work...I imagine you've gotten really good at removing/reinstalling engines by now.
Re: URS6 + 4.2T Getting Them Breakin Miles
Posted: Tue Jun 09, 2020 10:59 pm
by jolio1994
Takes an hour tops. It definitely helps to have another BCY engine I can build everything on off to the side
Piping is done. Installed it in the car for a final test fit and all is well. Just need to weld the o2 bungs onto the pipe and heat wrap the crossover pipe.
Pulled the engine out for final assembly, but still waiting on the 2" schedule 10 cap for the driverside manifold.
Trimmed the wiring harness down today so I have the essentials, and so it doesn't clog up the engine bay. Should be starting it this weekend if all goes well.
Those turbos are in a new zip code, good thing for the lifeline
Looks great!
Re: URS6 + 4.2T Getting Them Breakin Miles
Posted: Mon Jun 15, 2020 7:15 am
by lorge1989
Looks good. Good work!
Any plans to have the pipes ceramic coated?
Re: URS6 + 4.2T Getting Them Breakin Miles
Posted: Mon Jun 15, 2020 5:40 pm
by jolio1994
Not going to coat the manifolds just yet, curious to see how how it gets under there first. If it needs it then I will do it. Engines back in, but I'm still having the same issue which was the cause for pulling it out.
-New battery, also have jump box
-Cranks very slowly, voltage drops to about 6-7v while cranking and the car won't start.
I bench tested the starter and also turned the engine over by hand while it was out, no issues there.
Possible the starter is bad now that it has a load (the flywheel tone ring)?
 2020-04-25_07-59-47 by Joel Francisco
 20200503_191907 by Joel Francisco
 20200503_190840 by Joel Francisco
 20200503_193024 by Joel Francisco
 20200503_191534 by Joel Francisco
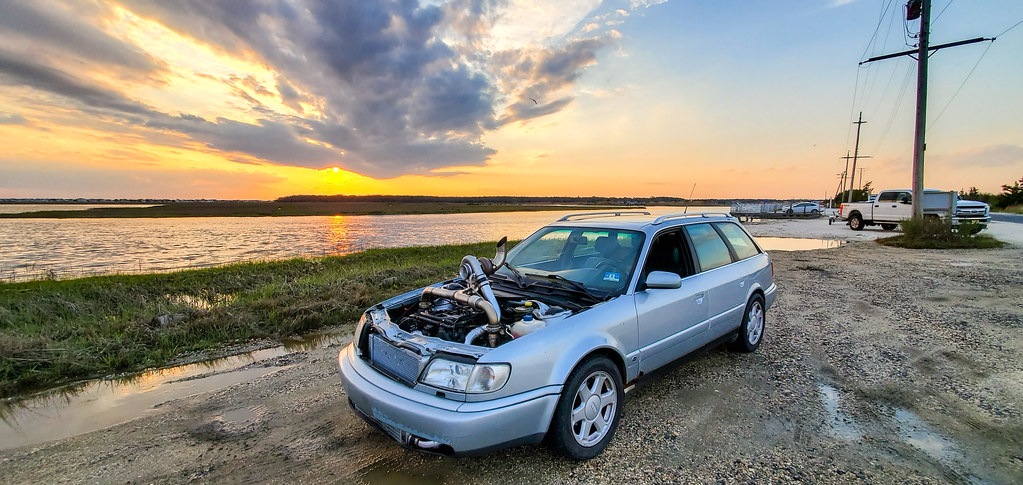 20200503_192938 by Joel Francisco
 20200503_193043 by Joel Francisco
 2020-05-27_07-34-42 by Joel Francisco
 20200529_212527 by Joel Francisco
 2020-06-05_08-44-14 by Joel Francisco
 20200606_205051 by Joel Francisco
 20200606_204236 by Joel Francisco
 20200606_221516 by Joel Francisco
 20200606_222730 by Joel Francisco
 20200606_221947 by Joel Francisco
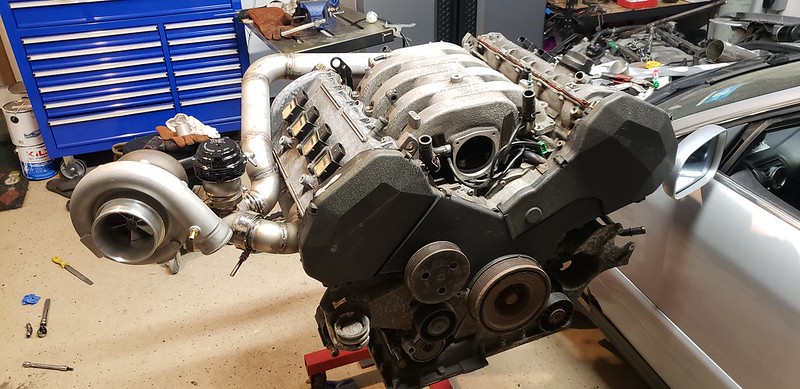 20200607_222212 by Joel Francisco
 20200607_222259 by Joel Francisco
 20200607_222435 by Joel Francisco
 20200609_155818 by Joel Francisco, on Flickr
 20200608_175930 by Joel Francisco, on Flickr
 20200608_155553 by Joel Francisco, on Flickr
 20200615_161553 by Joel Francisco
 20200615_170250-1 by Joel Francisco
 20200615_163803 by Joel Francisco